Verifying your Domain on Facebook using PixelYourSite
Facebook’s Aggregated Event Measurement requires you to verify your domain inside the Business Manager.
Learn how the PixelYourSite plugin can help you to verify the domain.
or
Facebook’s Aggregated Event Measurement requires you to verify your domain inside the Business Manager.
Learn how the PixelYourSite plugin can help you to verify the domain.
Domain verification is part of the changes Facebook implements in respect of Apple iOS 14 privacy changes. Facebook will ask Apple permission to track 8 conversion events per domain. Domain verification establishes which Business Manager account has the authority to configure and prioritize the 8 available conversion events for a given domain.
Domain verification allows you to manage editing link permissions for both organic and paid content. Only trusted partners or employees can edit make changes to your content.
After you verify your domain, Pages without editing permissions will not be able to make changes to your ads.
Domain Verification is a simple process that you can do inside your Business Manager.
There is one step you need to perform on your website that involves one of the 3 following options:
Among the three, Meta-Tag Verification is the easiest, and you can do it with the PixelYourSite WordPress plugin.
Log in to your Business Manager and go to Brand Safety > Domains
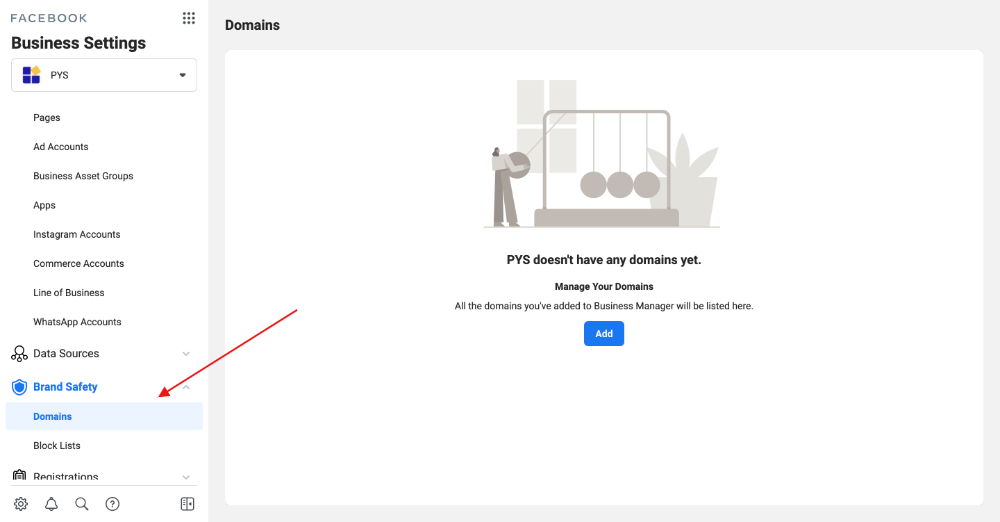
Click the “Add” button, and add your domain in the popup. Click on “Add Domain”.

After you add your domain, REFRESH the page. Sometimes this is needed to continue.
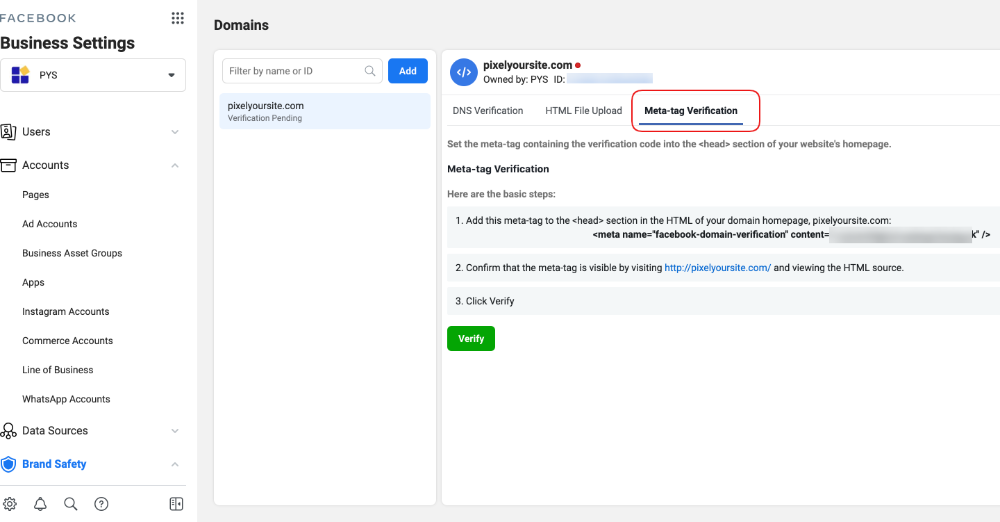
You will see the 3 verification options. Click on Meta-Tag Verification.
Click on the bold meta-tag to copy it.
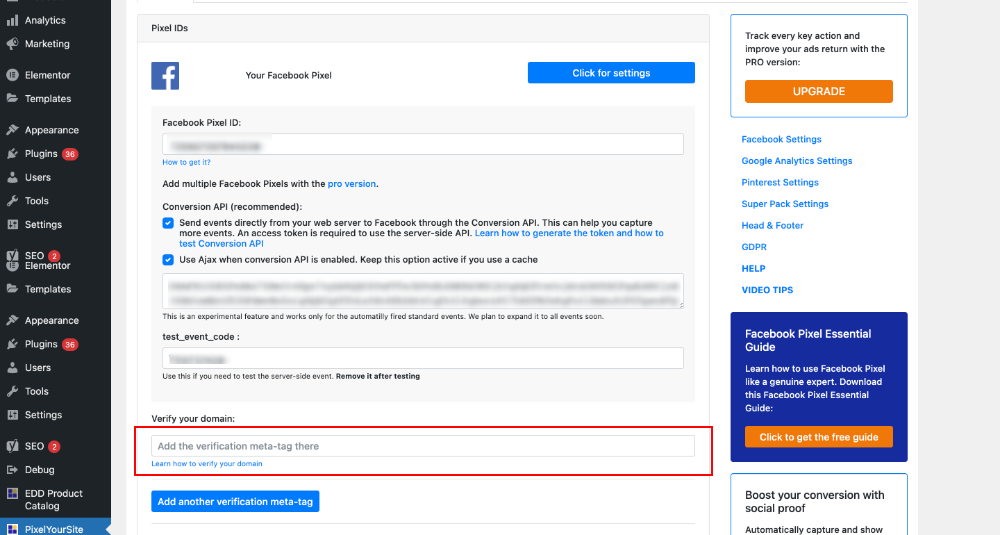
Go to your website’s admin, and open the PixelYourSite plugin. Click on the “Click for settings” button next to the Facebook Pixel.
Look for the “Verify your domain” field, and paste the meta-tag. Scroll down, and save.
If you have a cache plugin, delete your cache.
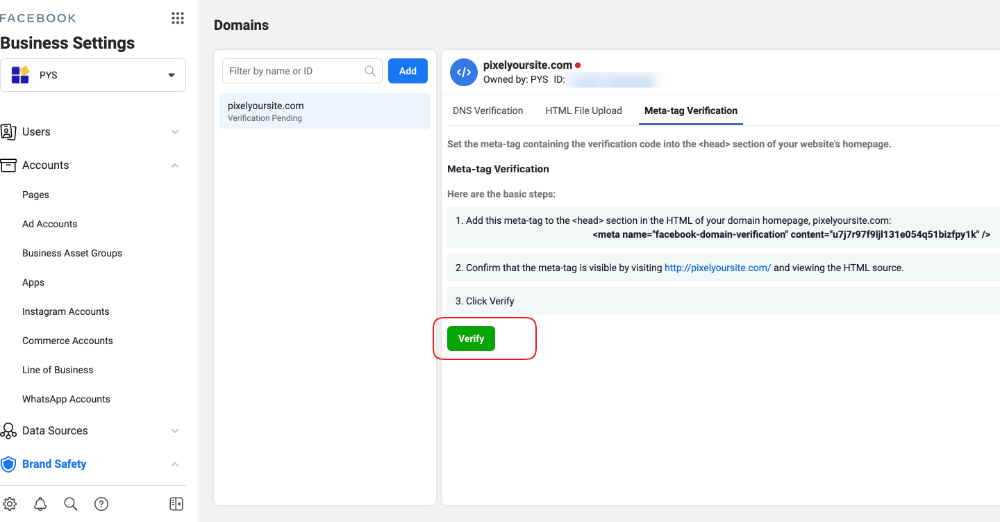
Go back inside your Business Manager, and click the green “Verify” button.
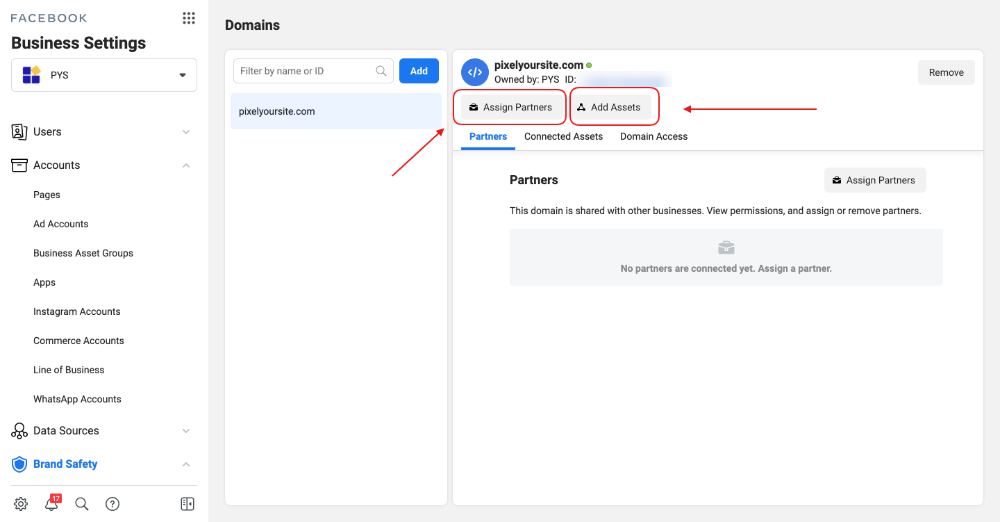
Once your domain is verified, you can share it with other businesses or connect it to other assets.
Click on the “Assign Partner” button to give permissions to other businesses. You’ll need their business ID.
Click on the “Add Assets” button to connect the domain to other assets controlled by your business.
© PixelYourSite.com. This site is managed by Minimal Work SRL, RO35964491, J38/337/14.04.2016, Bujoreni, Olteni 145, Valcea, Romania