The Signal event and Aggregated Event Measurement
How to configure Custom Conversions with the Signal event
How to add the Custom Conversions to Aggregated Event Measurement
How to configure Custom Conversions with the Signal event
How to add the Custom Conversions to Aggregated Event Measurement
IMPORTANT: since version 9.0, the Signal event was REPLACED by individual Automatic Events. Click to learn more.
Standard Events like AddToCart, or Purchase, are automatically available for selection in the Aggregated Event Measurement Manager.
But you are not limited to just the Standard Events. You can create Custom Conversions tailor-made to capture any action that is important to your business.
Once you have the Custom Conversion added to Aggregated Event Measurement, you can track your ads for it, or use it for ads optimization.
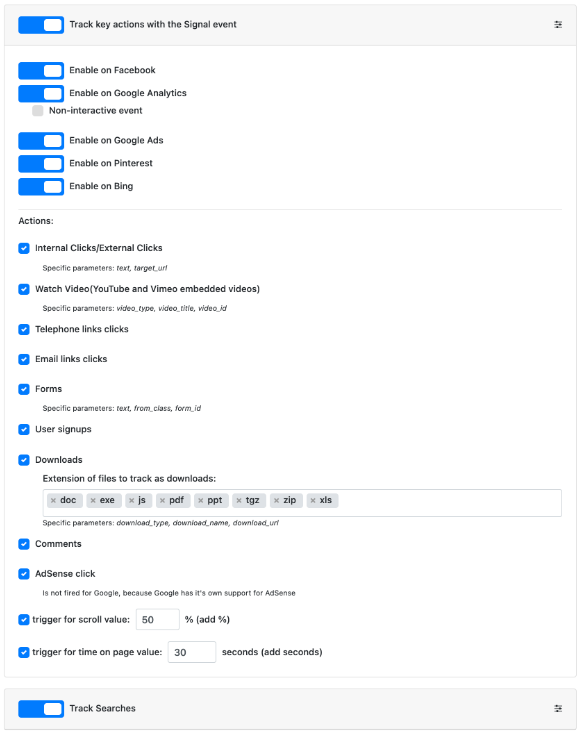
The Signal event can capture almost any action and has useful parameters. You can find its settings on the PixelYourSite plugin’s main page.
Learn how to use it for Custom Conversions.
Start by visiting your website and replicate the action you want to track with your Custom Conversion. Do what you want your visitors to do, like downloading something, clicking on affiliate links, completing a contact form, watching an embedded video, etc.
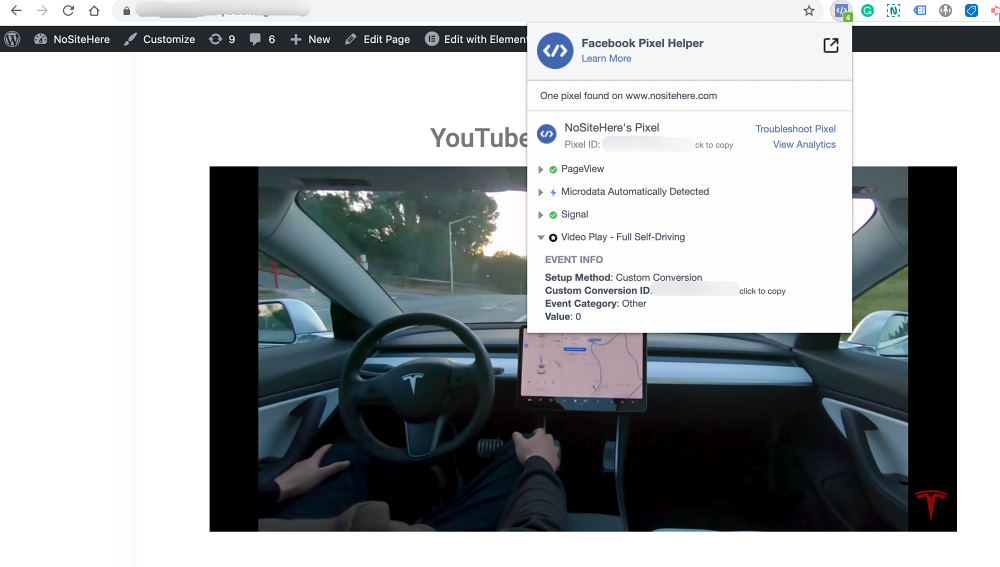
Use the Pixel Helper Chrome extension to check what event is fired by PixelYourSite for that action. Click on the event and check its parameters. It will give you a good idea about how to configure the Custom Conversion.
For this example, we will use an embedded YouTube video with the title Full Self-Driving, and we will want to track users that clicked play.
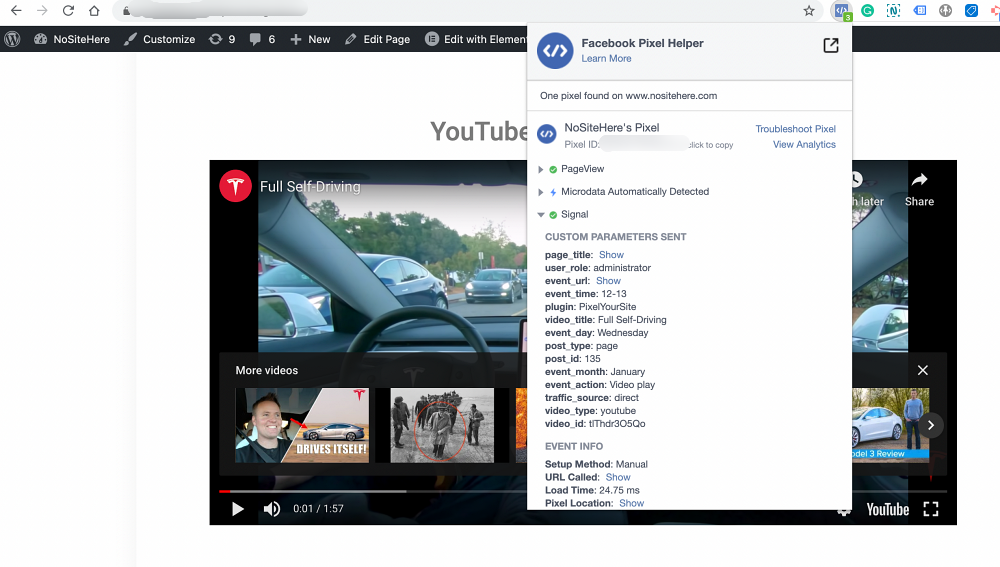
You can see that there is a Signal event where event_action is “Video Play”, and video_title is “Full Self-Driving”. We will use this event and those two parameters for our demo Custom Conversion.
Important: it’s possible to have multiple Signal events, fired by various triggers. Identify the one related to the action you what to track with the help of the event’s parameters.
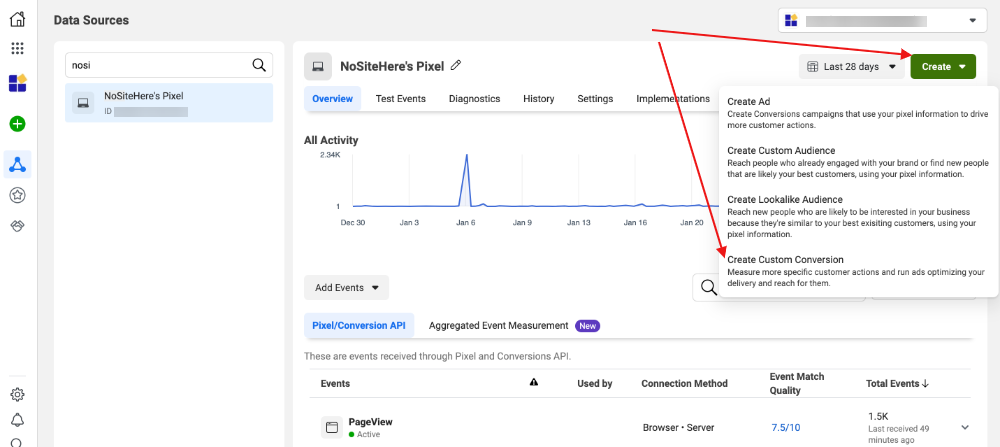
Go to Events Manager, select the pixel you want to use, and click on the green Create button. Select Create Custom Conversion.
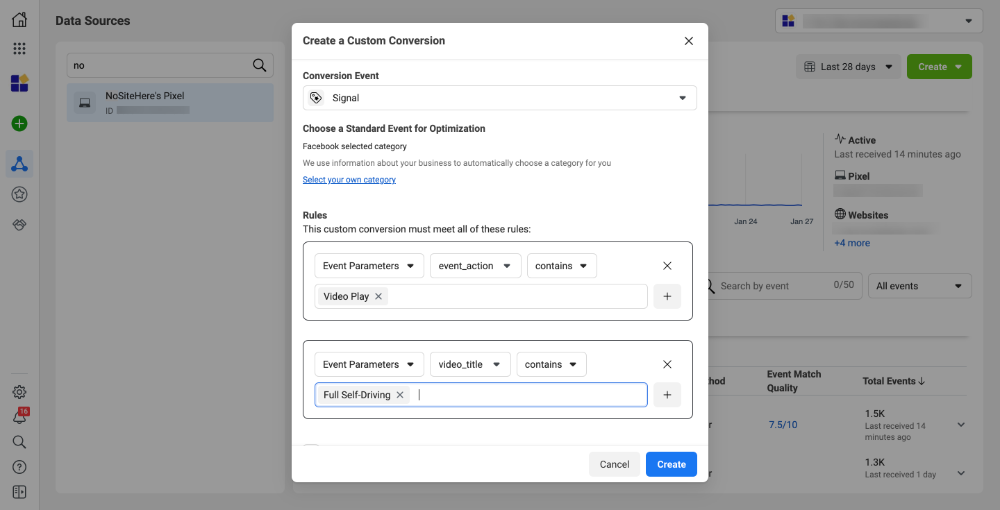
Give it a relevant name.
Select Signal for Conversion Event.
Configure rules based on the two relevant parameters:
Click Create.
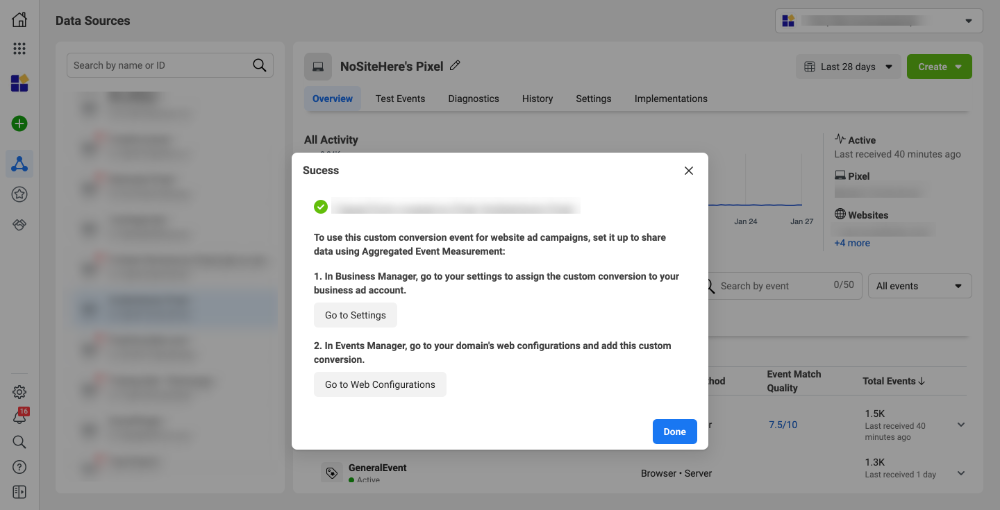
In the next popup you will be presented with two options:
1. In Business Manager, go to your settings to assign the custom conversion to your business ad account. Do this if you need to. Go to settings and click on Add Assets. Select the account that will control this conversion. You need this step only when the Business Manager has multiple accounts.
2. In Events Manager, go to your domain’s web configurations and add this custom conversion. Before doing this, visit your website and check if the conversion works. It might take a few minutes for the new conversion to be available under domain’s web configuration, and it’s best to fire it yourself a few times.
Go to your website and replicate the action that fires the conversion.
Check with Pixel Helper if it works.
Once you know that the conversion works, add it to your domain’s web configurations.
If you still have the popup open, you can click on Go to Web Configuration.
If you don’t have the popup anymore, go to Events Manager and click on Aggregated Event Management.
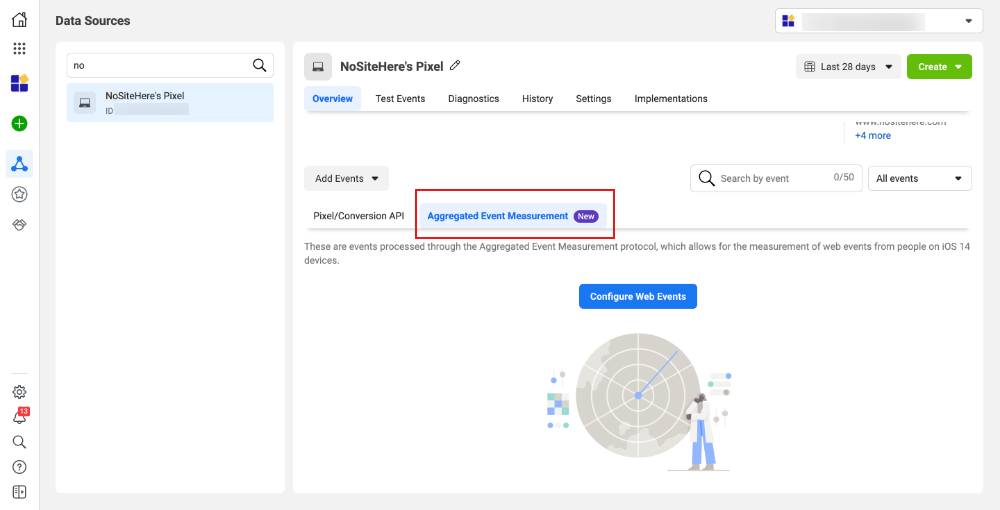
Select the domain and click Edit Events.
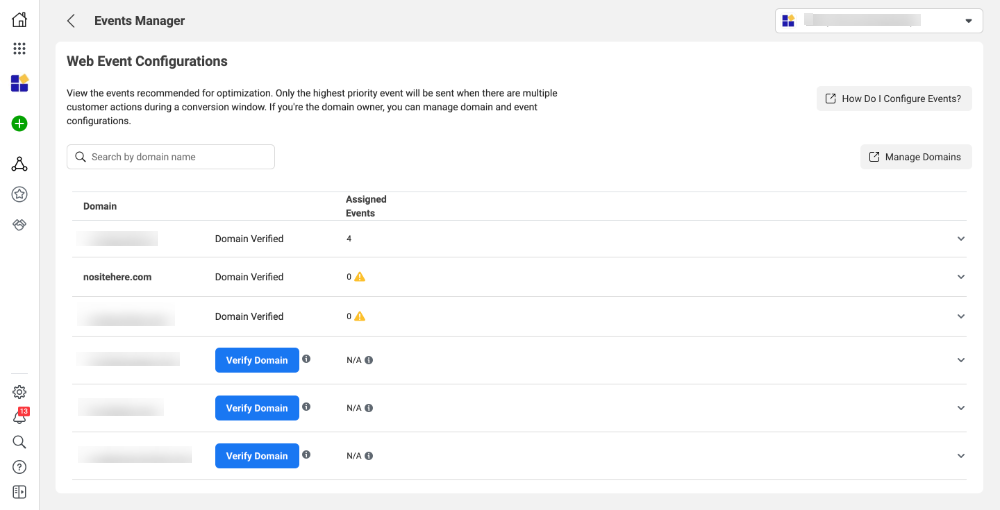
Under Pixel/Custom Conversions select Custom Conversion.
In the second selector select the Custom Conversion’s name.
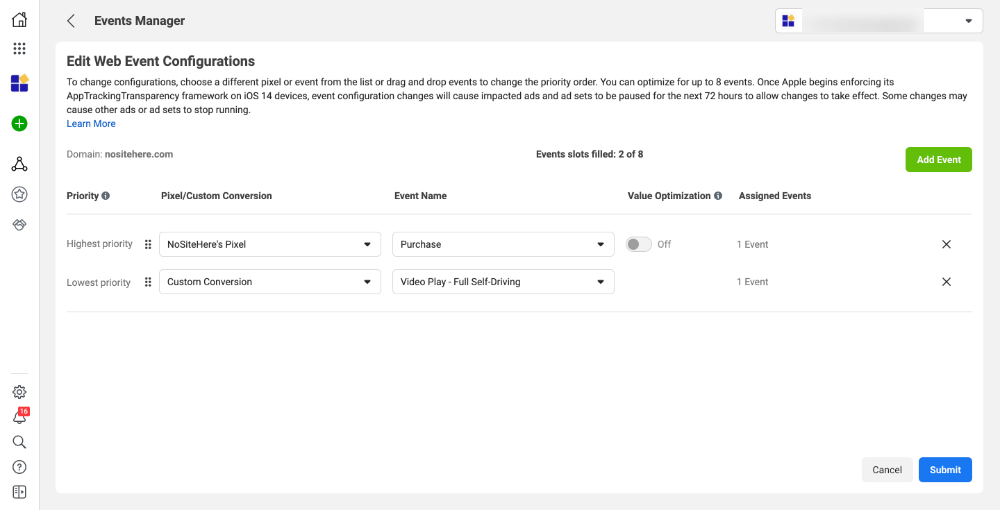
If you don’t see it, make sure that the ads account has access to this conversion. It can take a few minutes for Facebook to update the data. Wait 10 minutes, refresh the page, and try again.
Your Custom Conversion is now ready and you can use it to track ads results or to optimize your ads.
© PixelYourSite.com. This site is managed by Minimal Work SRL, RO35964491, J38/337/14.04.2016, Bujoreni, Olteni 145, Valcea, Romania