How Can We Help?
Add your Pinterest tag
The Pinterest Tag Add-On will automatically insert the Pinterest tag on all your site pages.
How to install the Pinterest add-on
Download the add-on files:
You can find your files in 3 different ways:
- On the “Thank You Page”, right after your payment is completed
- In our Purchase Confirmation Email that you will receive after the transaction
- In your account on our site. You’ll get an email with your credential once you complete your first transaction with us.
Upload the add-on files on your site:
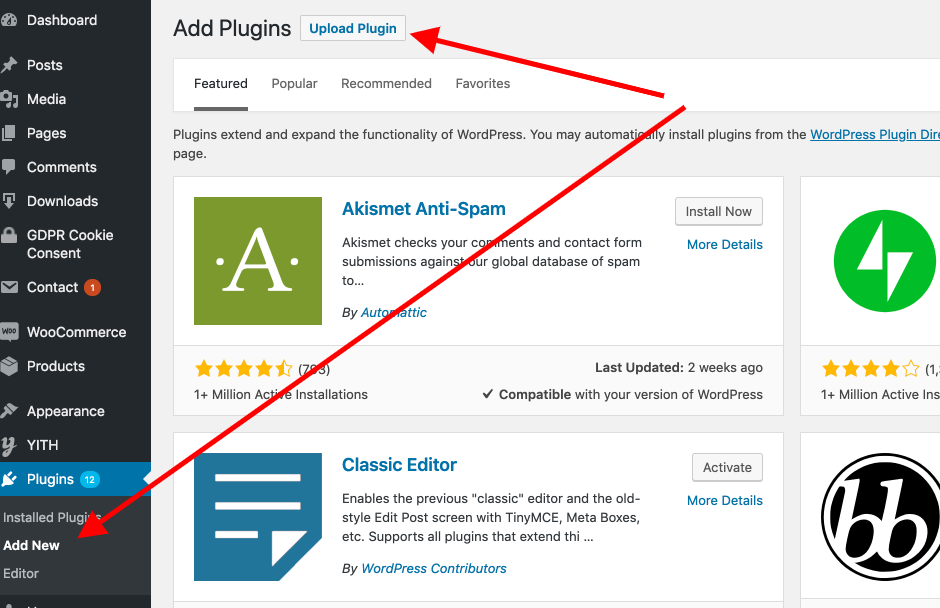
Login to your site admin and click on the Plugins link in the left menu. Click on “Add New” and then on the “Upload Plugin” button

Click on the “Choose file” button and select the add-on files you’ve downloaded earlier. Click “Install now”

Click the “Activate Plugin” button.
Activate your add-on license
Important: Make sure you activate the license key before using this add-on. You can find it in the email you’ve got from us, or directly into your account. Open the License link from the PixelYourSite left side menu, and activate it there.
Add your Pinterest Tag ID and claim your website
Important: You don’t need the full code, just the ID.
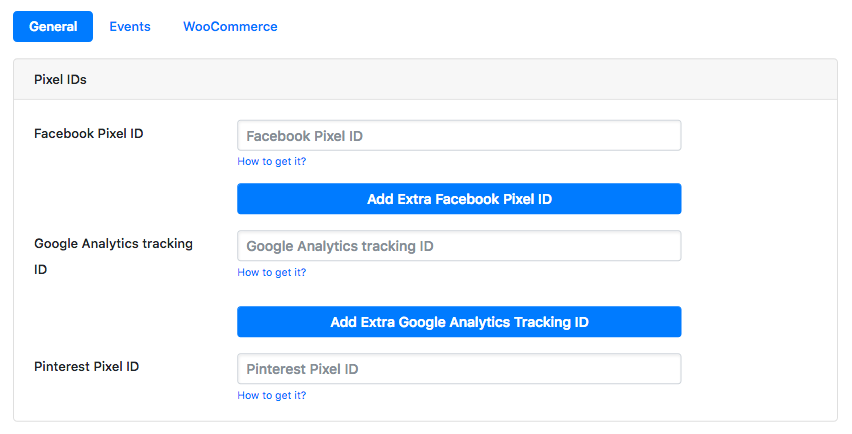
You will find the Pinterest tag ID field on the plugin General tab. Remember to click the “Save Settings” button once you’re done.

Where to find the Pinterest tag ID
In your Pinterest Ads Manager, move your mouse over the “Ads” top menu link and click on “Conversion Tracking”.
If you already have one or more tags, you will see them listed here. Copy the tag ID, and add it inside PixelYourSite settings.

How to generate your Pinterest Tag
In the “Conversion Tracking” section click on the “Create tag” button. Give your new tag a name and click on “Generate code”.