Your Purchase Conversion Value can be misleading
Let’s say you just spent $500 on your Facebook Ads generating $1000 in sales. Chances are that your Facebook Ads will report a reassuring $1000 conversion value. That’s because, most of the time, the Purchase Event value is equal to your transaction TOTAL value.
But there’s a big problem with these numbers: you can’t really tell if you’re making or losing money!
How the real experts do it? Track both TOTAL and PROFIT
Some of our most experienced clients use custom solutions to add the Cost of Good for every product they sell.
But that’s not all. We learned a super-simple trick that lets you track both the total transaction value and your real profit.
What plugins do you need?
WooCommerce Cost of Goods
This plugin will add the cost of your products, calculate profit for each order, use profit as your Facebook conversion value.
You can find this plugin here.
PixelYourSite
This plugin will let you send the PROFIT as Facebook Pixel events’ value.
You can use the free, or paid version.
Send both TOTAL and PROFIT to Facebook
Your WooCommerce Purchase Event will track the TOTAL value of your orders and your CompleteRegistration Event will track PROFIT.
We added an option inside PixelYourSite PRO to fire the Facebook CompleteRegistration Event every time a transaction takes place. You also have a new option to send the PROFIT calculated by the WooCommerce Cost of Goods plugin as the event’s value.
All is left to do is to customize your Facebook Ads Reports so that you can see both values.
Step by step guide:
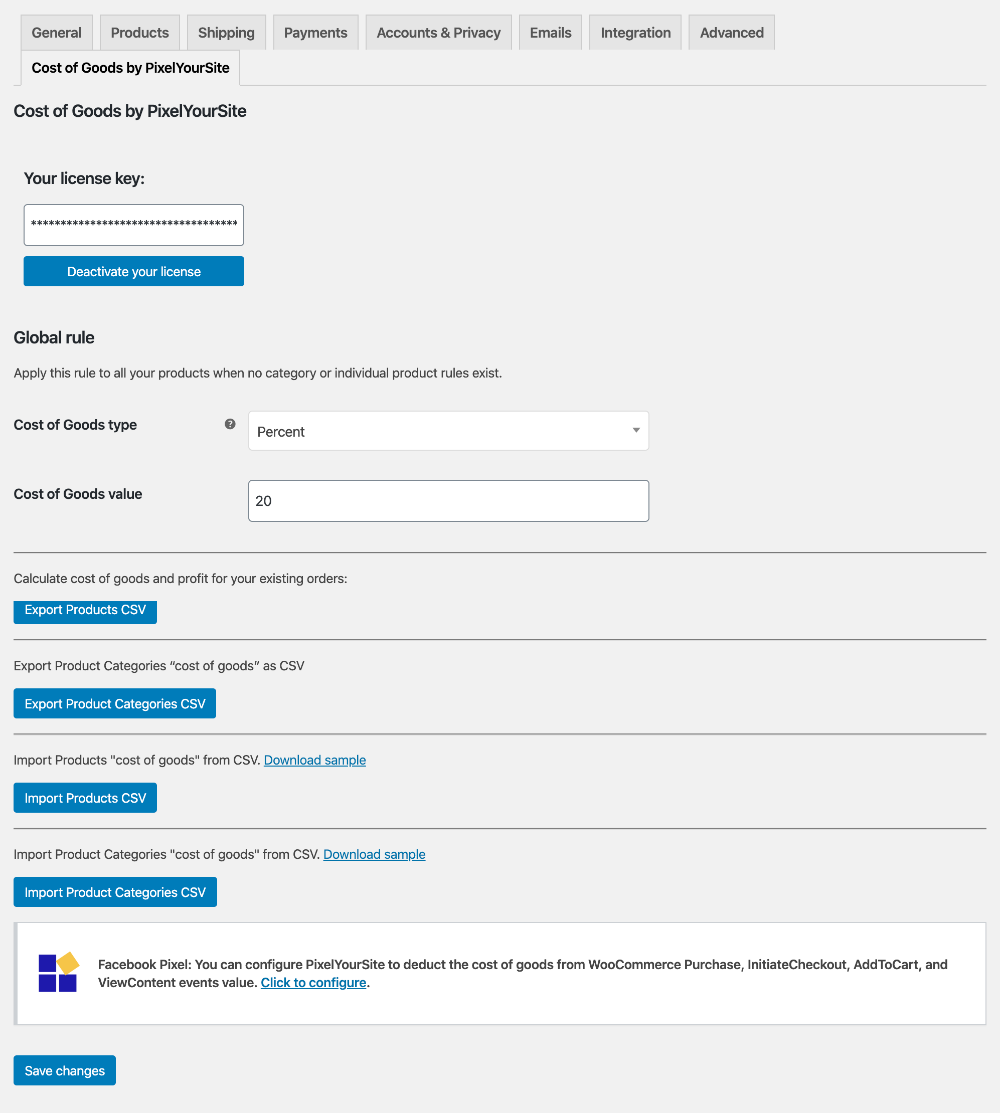
Install the WooCommerce Cost of Goods plugin and configure the cost

The plugin is super-flexible and you can add the cost of goods (COG) in many ways:
- By editing a product or variation.
- As a product category rule.
- As a global rule.
- By exporting/importing a CSV file.
- By importing it from other COG plugins.
Once you have the COG in place, the plugin will automatically calculate the profit for every order.
Change your CompleteRegistration Event

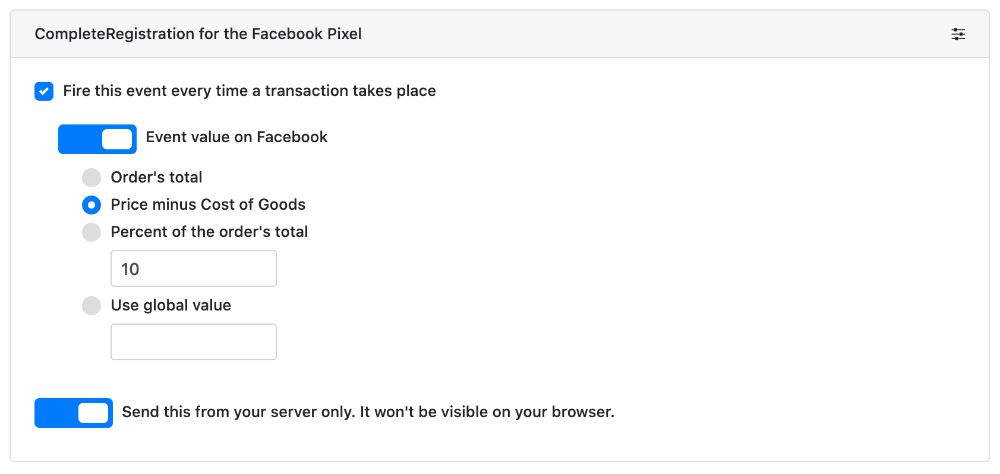
- Open your PixelYourSite Pro plugin and click on WooCommerce.
- Look for “CompleteRegistration for the Facebook Pixel” and click on it.
- Check the option to “Fire this event every time a transaction takes place”.
- Turn ON value and select “Price minus Cost of Goods”.
- Save.
This option is available since PixelYourSite v 7.5.2. If you can’t find it, please update to the latest version.
Create a Facebook Ads custom report

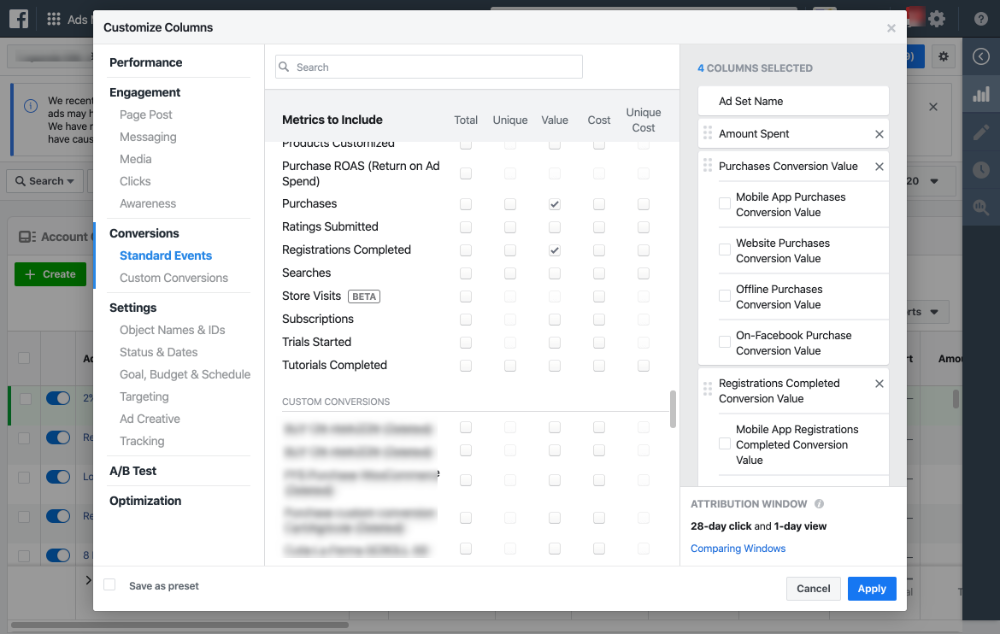
- Inside your Ads Manager, open your reports and go to “Columns”. Click on “Customize columns”.
- Remove all the selected columns you have in the right sections (COLUMNS SELECTED). You want to make room for the ones you need.
- Click on “Performance” and check “Amount Spent”.
- Click on “Standard Events” and check “Purchase Conversion Value” and “Registration Completed Conversion Value”. In the right column, you can uncheck the mobile, website, and offline checkboxes.
- In the bottom-left corner check “Save as preset” and give this report a name. Click “Apply”.
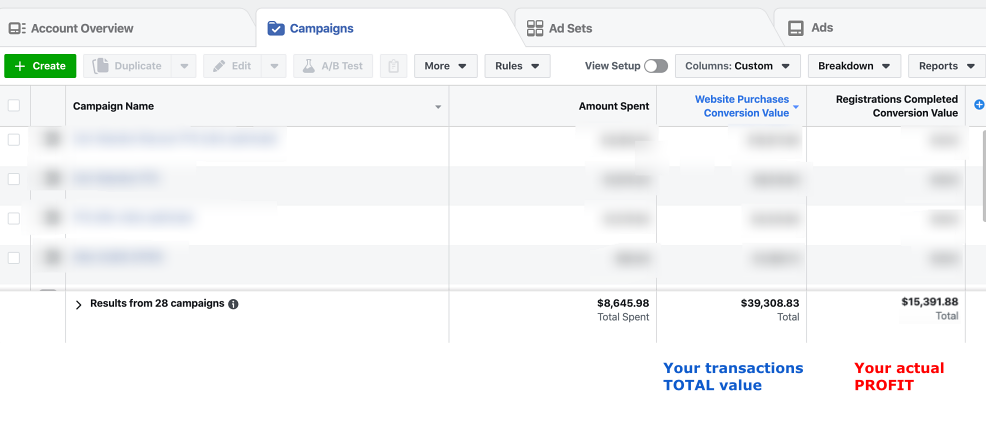
The new report will show the total amount of money your ads generated (Purchase Value), and the PROFIT (Registration Completed Value).

IMPORTANT: hide your profit
Events’ values are visible to your website visitors, either in the page source or if they use the Pixel Helper Chrome extension. So, if you send your profit as CompleteRegistration value, someone with the right knowledge can see how much you actually make. They can order something on your website, check the event’s value, and simply ask for a refund.
There is a solution to this problem: send the CompleteRegistration event server-side only. This way it will be invisible on the client’s browser, hiding your profit from curious eyes.
This is what you need to do:
- Keep the “Send this from your server only.” option active in the CompleteRegistration event settings.