How to make a Dynamic Ads template from the Power Editor
With Dynamic Ads you can promote a product catalog to people that engaged with your products but didn’t buy them just yet.
Until recently, doing a Dynamic campaign was only possible by using the Power Editor, and you can see the step-by-step process in this video.
Facebook made possible for us to create and manage Dynamic campaigns directly from the Ads Manager. Click here for a video on how to do it
What is Facebook Dynamic Product Ads
In Facebook own words, “Facebook dynamic ads helps you promote relevant products to shoppers browsing your product catalog on your website or mobile app”
What does this mean? You can automatically retarget visitors of your shop that did not buy your products (just yet).
What do you need to start doing Dynamic Product Ads in less than 10 minutes
1. Set Up Your Pixel
Easy: If you are using PixelYourSite plugin you are all set. All the necessary data for Dynamic Ads is automatically pulled from your WooCommerce site.
The plugin adds VewContent event on product pages, AddToCartEvent on the cart page and on add to cart button click, Purchase event on thank you page. All the events pull the product ID (or SKU) and product type, as needed to run Dynamic Ads.
Open PixelYourSite go on WooCommerce tab, activate each event and save the settings.
Not yet a PixelYourSite user? Click here to get it for a big discount
2. Upload Your Product Catalog
A product catalog, sometimes called a product feed, is a list of products you would like to advertise on Facebook. Each product in the list has specific attributes which can be used to generate an ad- a product ID, name, description, landing page URL, image URL, availability, and so on. We have a special article on How to Create your first Dynamic Ads Product Catalog.
Important: We have created a special Product Catalog Feed Plugin that automatically creates XML feeds that are 100% Facebook Dynamic Ads Compatible. The plugin has many smart options and out of the box field mapping, so you don’t have to do any hard work. (This is a WooCommerce plugin only)
If you don have the Product Catalog Feed plugin yet, Click Here to get it for a big discount
3. Create a Dynamic Template
You will create a dynamic template that will be automatically filled with product data. Use keywords to pull in images, product names, prices, and more dynamically from your product catalog.
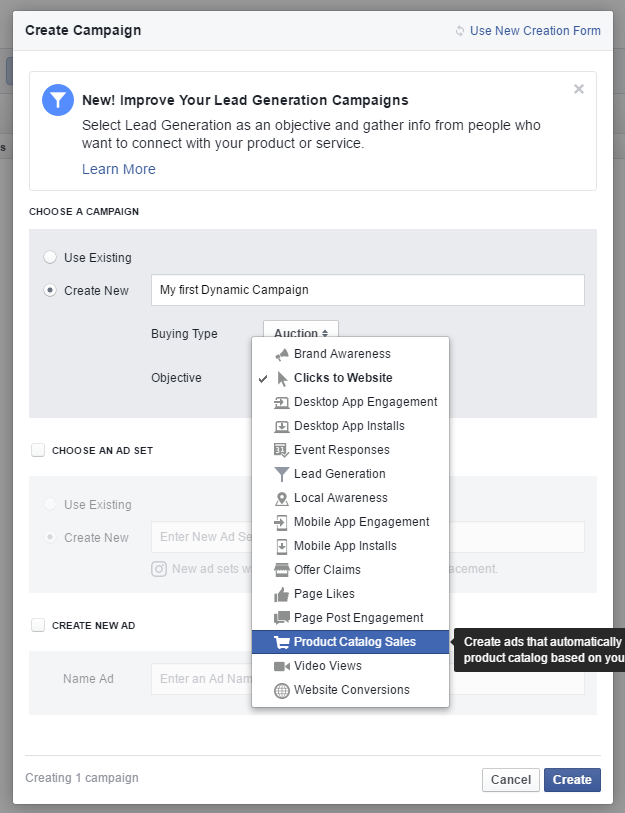
You will be able to create the Dynamic Template from Power Editor by selecting Product Catalog Sales as campaign objective . The process is intuitive and easy to learn.
Open Power Editor in Chrome Browser (you will find a link to Power Editor in the main menu). Click on the “Create Campaign” button on top left side. Name your campaign then select “Product Catalog Sales” as objective.
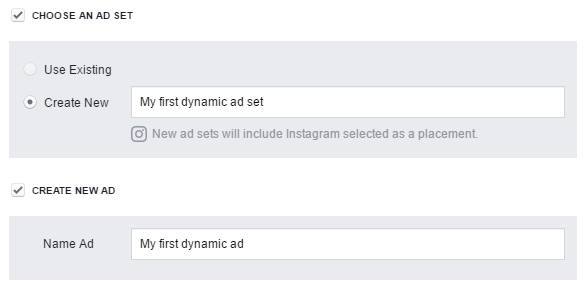
Once you do this, create your new ad set and ad:
After creating the ad set and the ad you’ll be asked to select the product catalog you want to use. After you do this, go on the left side of the menu and click on Ad Set icon.
Now you can define your budget or what type of campaign you want to do:View or Added to Cart But Not Purchased – Your ads will target any visitor of your shop that didn’t bought your products. Very powerful.
Added to Cart But Not Purchased – That’s basically a cart recovery type of campaign that you can do with the help of Facebook. We recommend to create one campaign and leave it on
Upsell Products – You define a set of products that visitors must see and Facebook will show the rest of the products in your catalog to them. Excellent to increase your exposer to potential customers
Cross-Sell Products – You will define a set of products that visitors must buy first, then Facebook will show them the rest of the products in your catalog. Excellent to expand your offer for existing customers.Having decided upon ad set properties, it is time now to deal with the ad itself. Click on the ad link from the left menu.
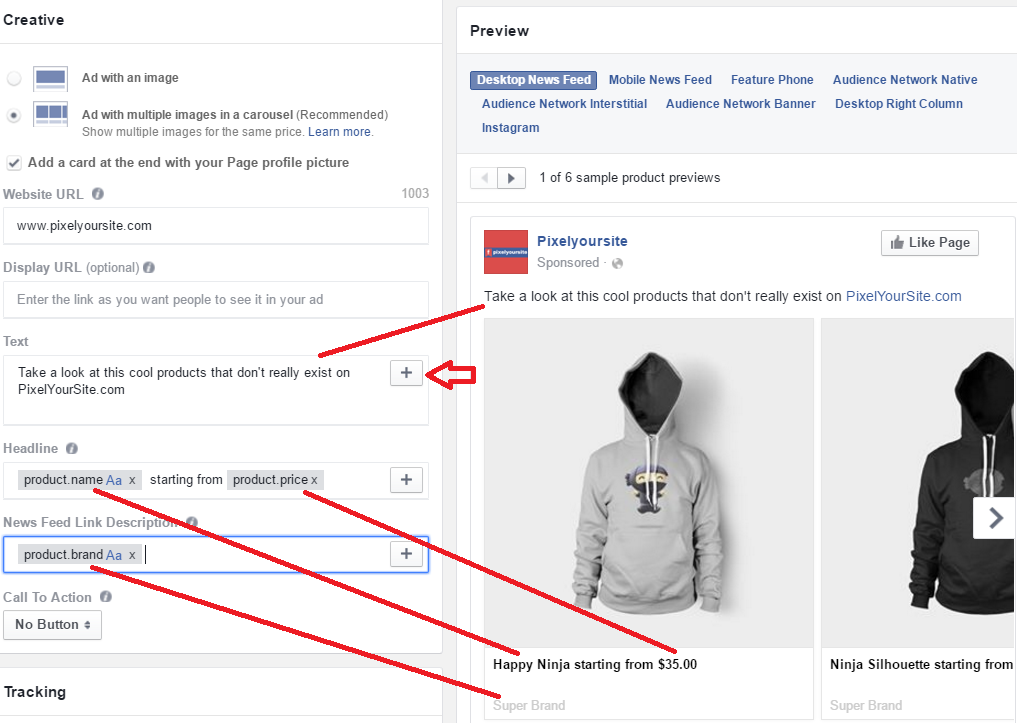
There are a few ways you can personalize the Dynamic Ads. First decide whether to show an ad with an image or an ad multiple images. Then add your site URL.
Write your ad text, Headline and News Feed Link Description. You can use keywords to pull data from your Product Catalog. Click on the top right corner plus sigh within the text area.
On the left side of your screen you will have a preview for your ads.
 Tracking – Add URL tags for better tracking of your results. We have an article on this topic.
Once you’re done with the ad template it is time to upload the changes set them to go live. Click on the “Review Changes” green button on the top left side of your screen. A popup window will open where you can review what you are about to export. Click on the “Next” button.
That’s it! Your first Dynamic Campaign is live and you can track it from the Ads Manager.