If you use PayPal as one of your payment getaways chances are that Google Analytics will show PayPal as a referer for your transactions, making impossible to see the real referrers. This happens because your clients will have to leave and your website in order to complete the payment. When they are automatically returned, Google will see that as the start of a new session and will report PayPal as the source of your transaction. The same thing will happen for every payment processor works in a similar way.
In this article, I am going to show you two different solutions to this problem.
The first one is the so-called “classical fix”, the one you can find in every article online. While popular and widely spread, this solution has a significant drow back: it doesn’t always work.
The other fix is much more efficient and it will ALWAYS work. I suggest you use them both.
The Classical Fix: Add PayPal to The Referral Exclusion List
You can add PayPal.com to your referral exclusion list, telling Google not to start a new session when someone is visiting your website coming from PayPal. While in theory, this should work, in practice is still possible to see PayPal reported as the referer for your transactions.
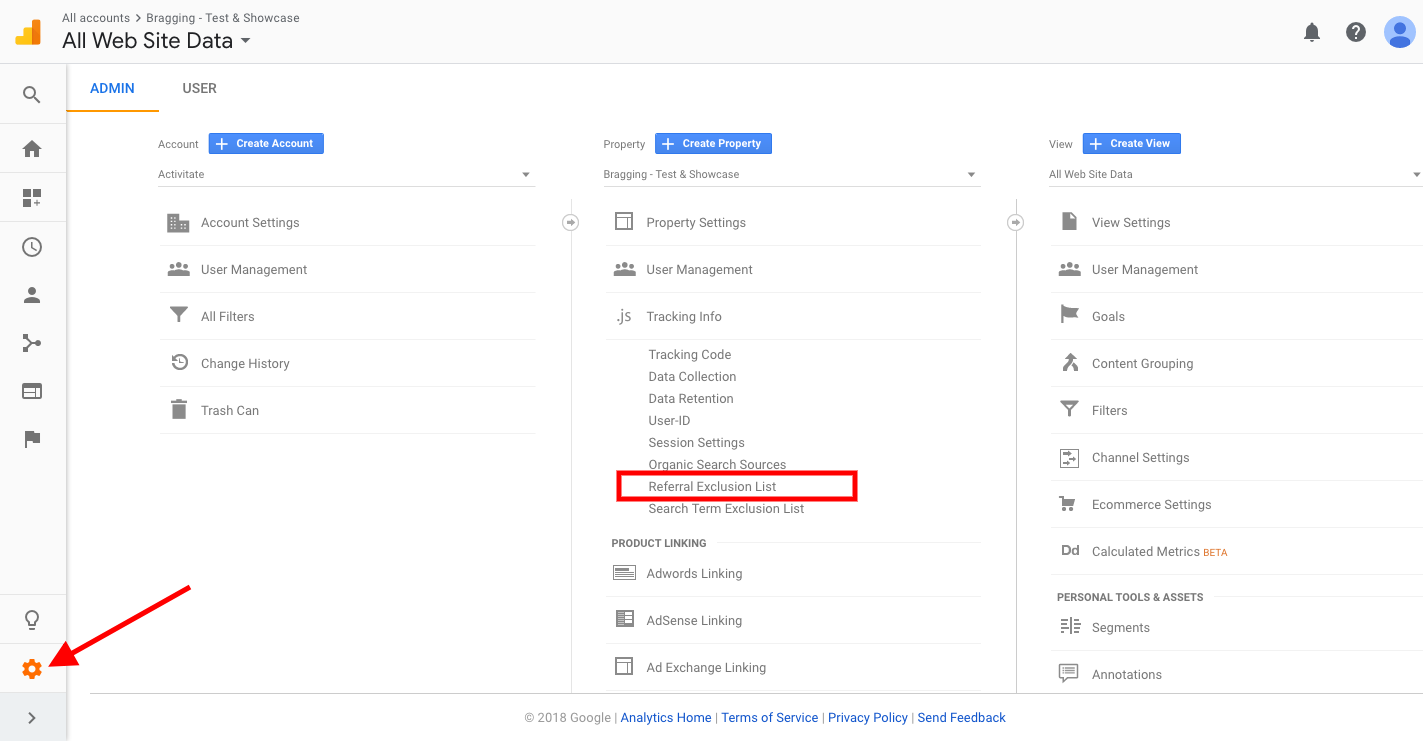
Open your Google Analytics account and click on the settings wheel in the bottom left of your screen. Click on Tracking Info and Referal Exclusion List:
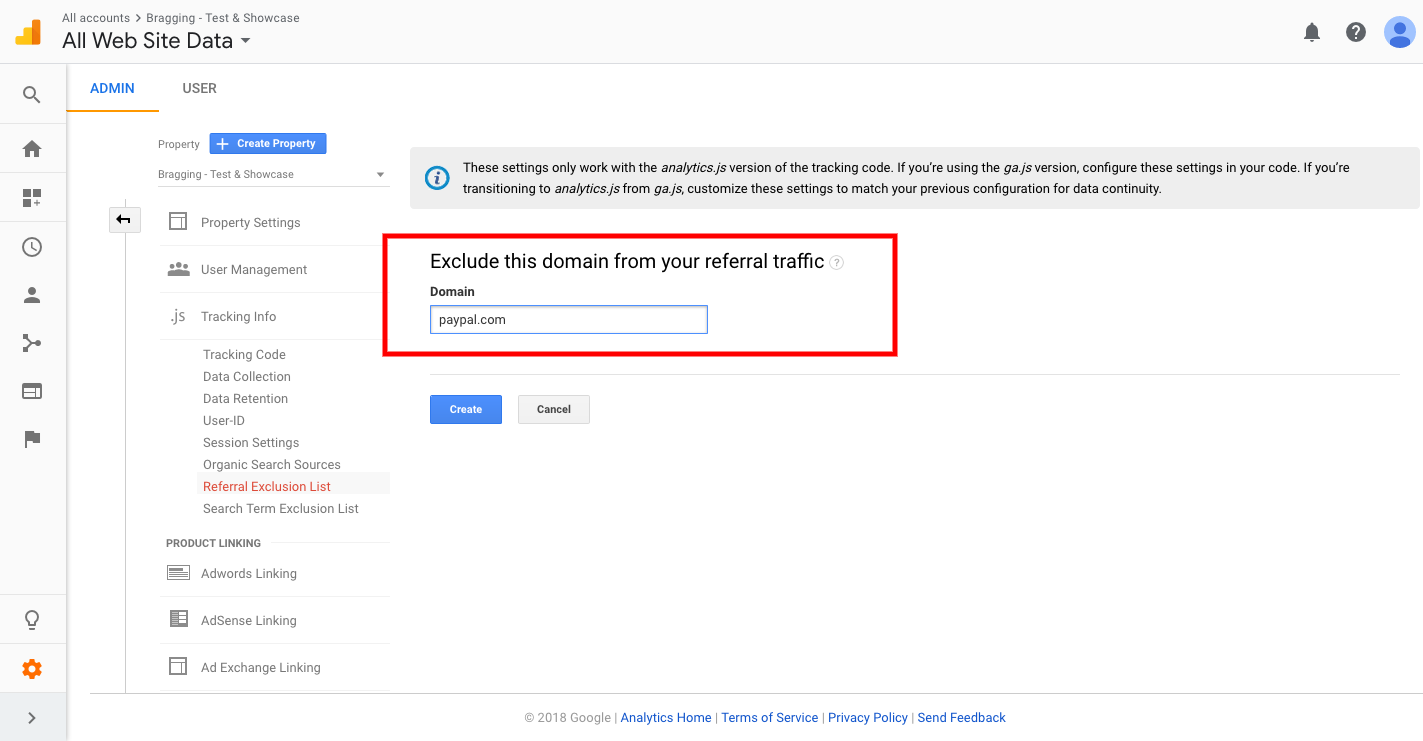
Click on the “+ Add Referral Exclusion” button add “paypal.com” and click on “Create:
The problem with this solution is that it will not work all the time. It’s still possible that Google Analytics will report PayPal as the referer for some of your transactions.
The Final Fix: Fire an Event on the “Pay Button”
This fix is much more efficient and consists in firing an event when your future clients click on the “pay” button, the one that will lead them on PayPal to complete the payment. Since this event is track BEFORE they leave the site, the correct referer will be always reported.
Configuring this event is very easy with PixelYourSite Pro, and I’m going to explain each step here. My example will be based on a WooCommerce website, but it works with Easy Digital Downloads or any other WordPress based solution.
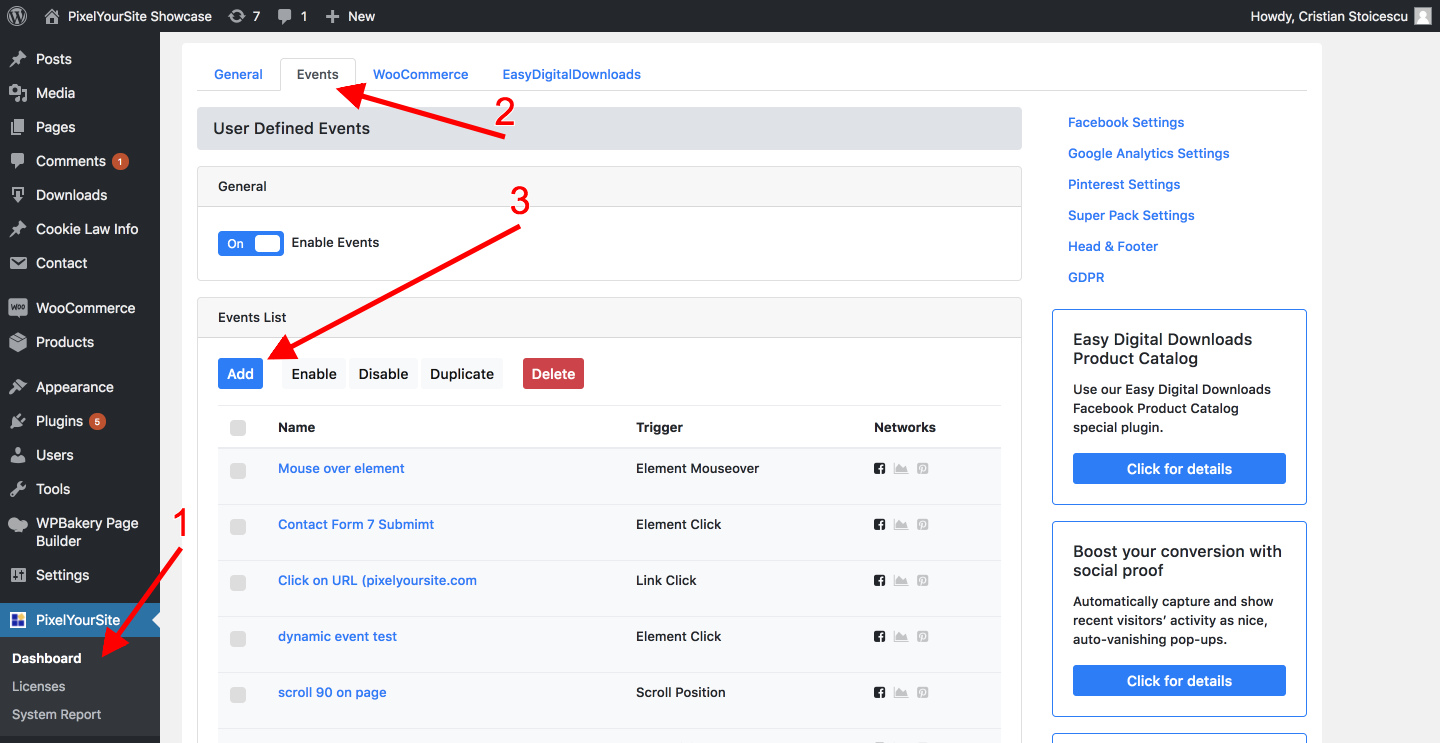
Open PixelYourSite Pro dashboard, click on the Events tab and on the blue Add button:
Now let’s configure this new Google Analytics event:
- Give it a relevant name (for internal use only)
- Configure the event trigger: pick the “Clicked on CSS selector” option and then use some CSS element related to the “pay” button (MORE DETAILS LATTER)
- Enable the event on Google Analytics. In my case, I define the event’s category as “PayButtonClick and category as “CustomEvents”. You are free to use any names you like here.
- Save your new event

How to find the right CSS Selector
We have full instructions on how to identify the CSS Selector here. It’s not complicated at all if you use your browser “Developer Tools”.
I will explain how I did it on a WooCommerce website using a Chrome browser:
On your Checkout Page perform the equivalent of the “right click”. In the small window that opens click on “Inspect”:
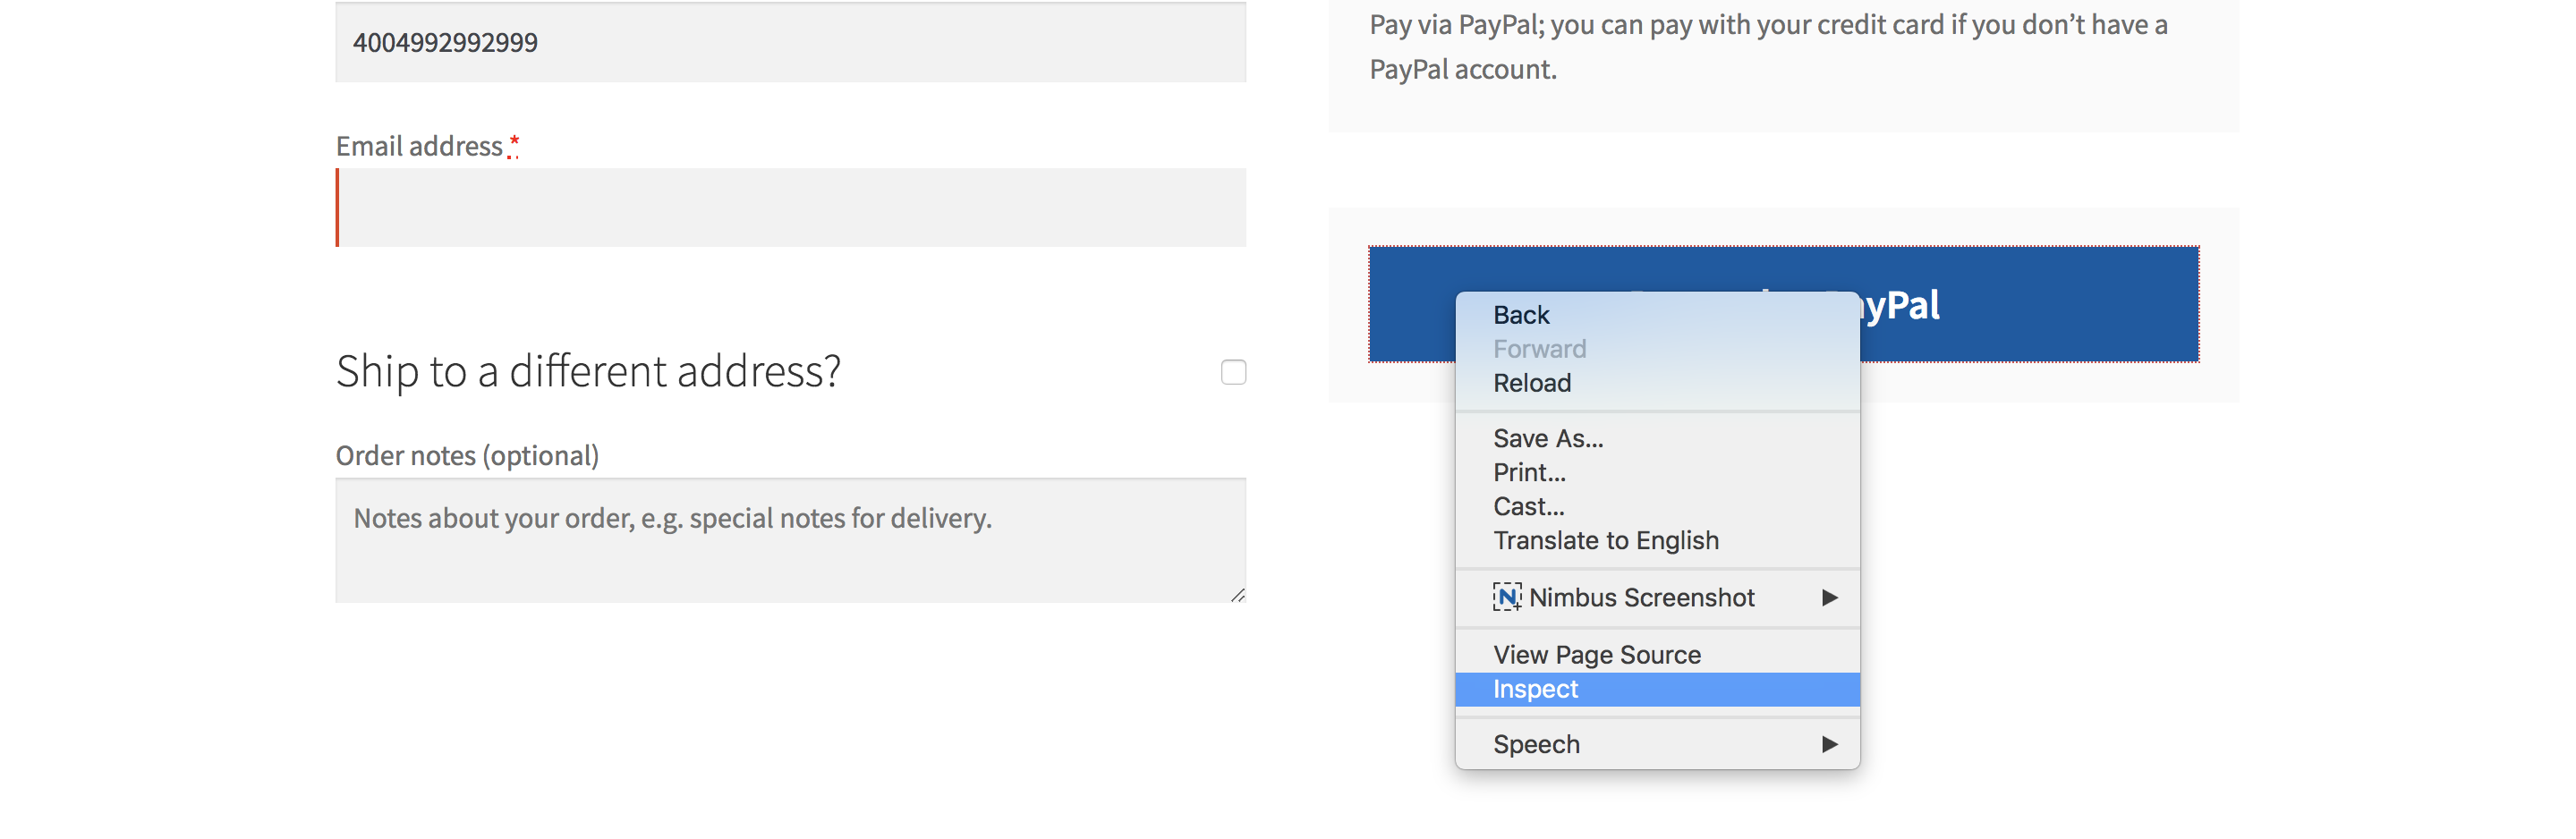
Click on the small arrow in the left corner and then select the “pay” button. In the console you’ll now be able to see all the CSS elements available for it:
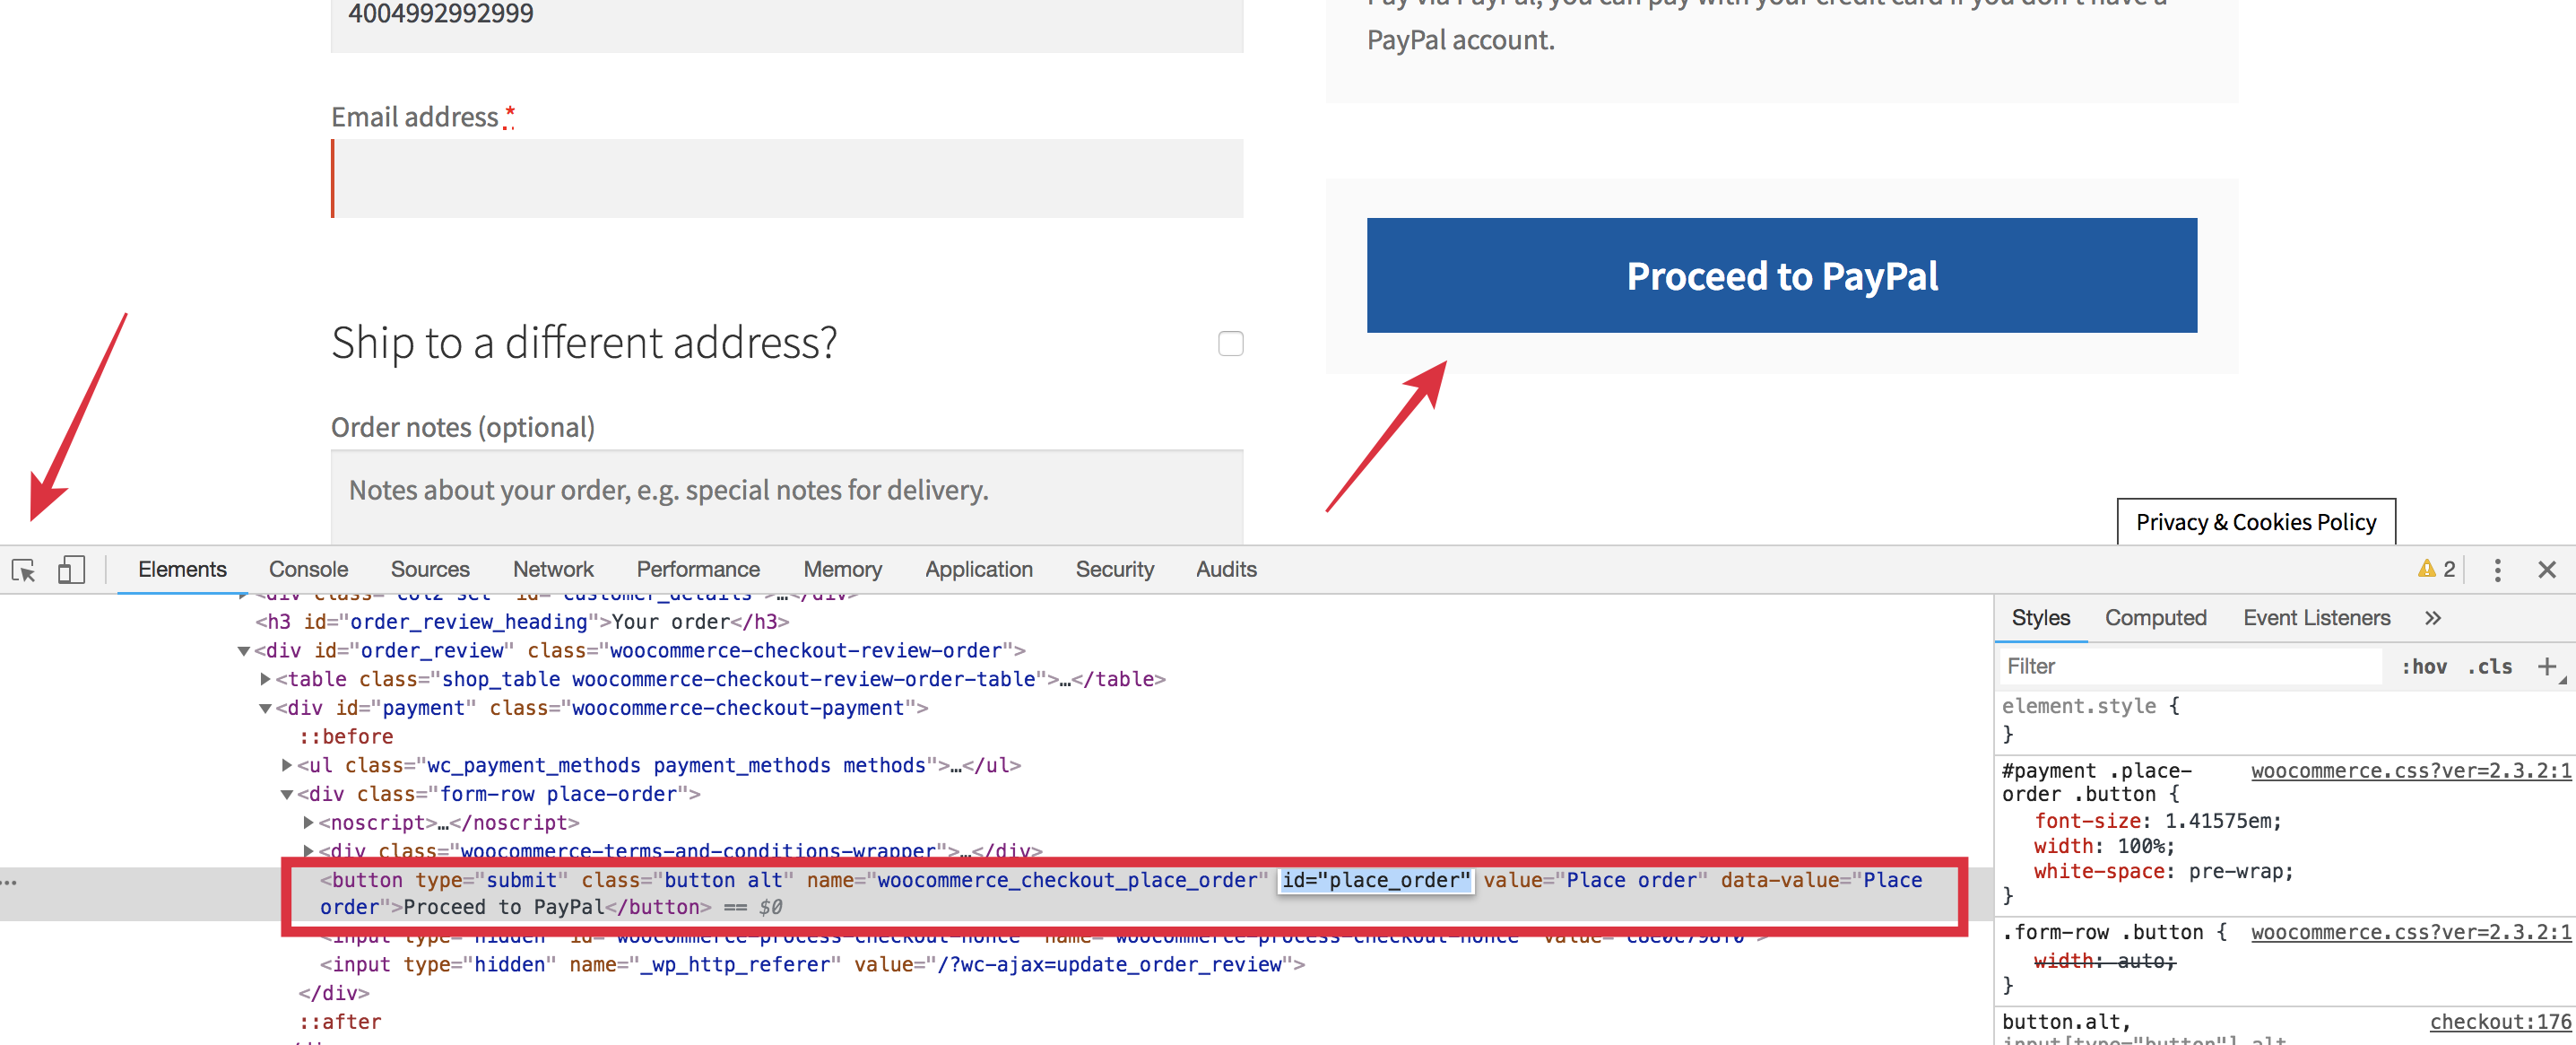
The actual content can vary depending on the theme and other factors. In my case, I decided to use the id:”place_order”.
At this moment you’re going to need some very basic CSS knowledge. In order for the selector to work, you have to use the right format: #place-order. There are various resources online about CSS Selectors that you can consult in case you have any doubts.
Track the Referer for Your New Event
Once the event is configured, it will start to fire for your feature orders. Give it some time for the data to be recorded and then take a look to find the real referees.
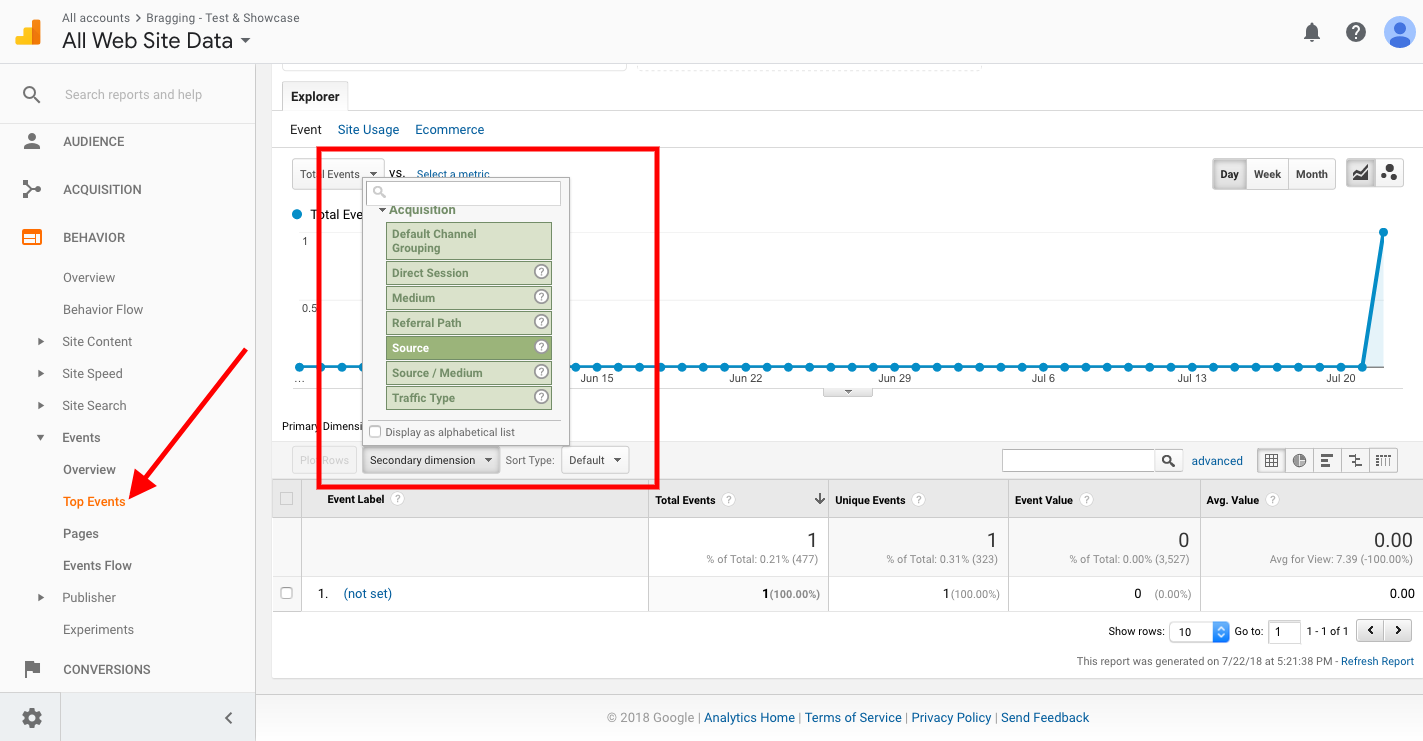
Open your Google Analytics and click on Behaviour, Events, Overview. Click on “CustomEvents” (or the name that you give to your event category) and on “PayButtonClick”. Click on “Secondary dimension” and select “Source”.
If you want to see the revenue value for this event you can click on the Ecommerce link. The advantage is that the revenue will be broken by traffic source:
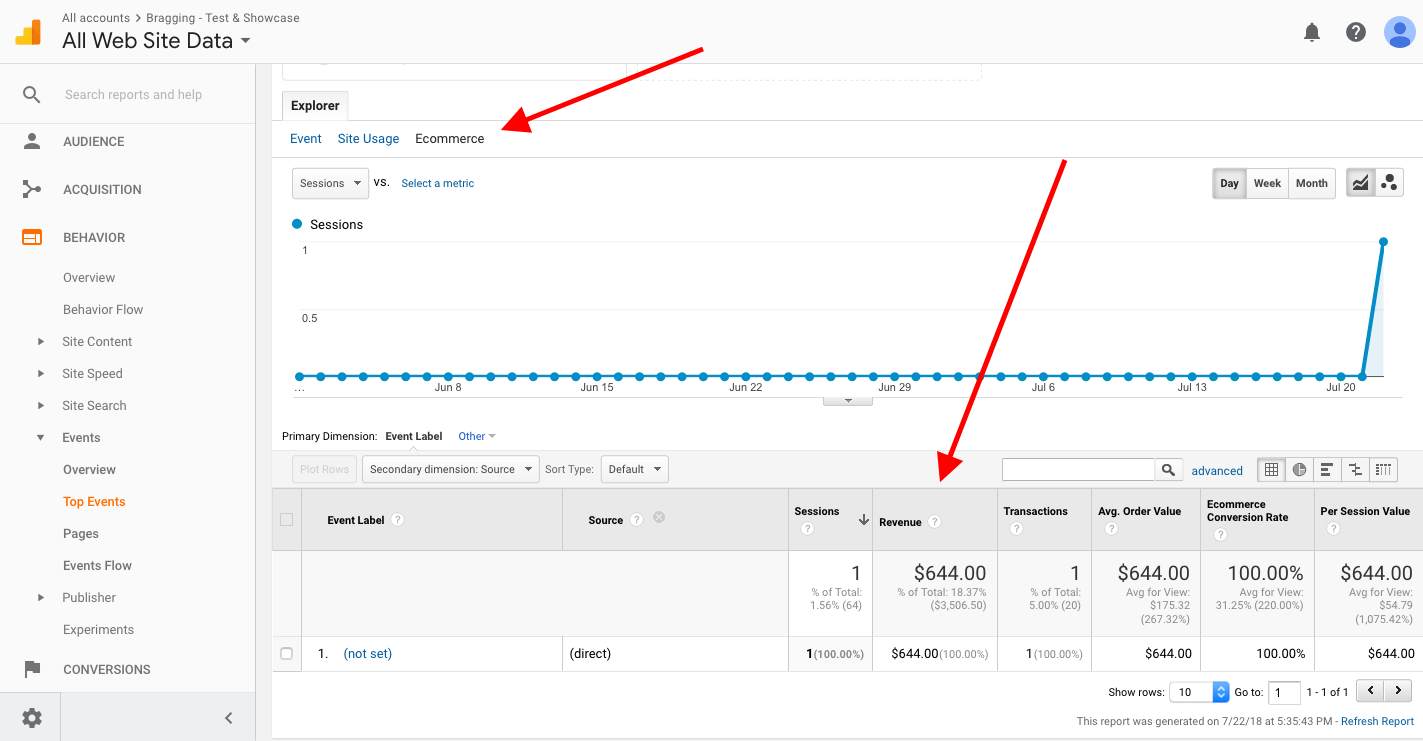
There are some disadvantages to this approach as well. Some events will be fired without a real transaction taking place. This happens if the user doesn’t complete the payment once it lands on the PayPal website. You can see the impact of this in the “Ecommerce Conversion Rate” column.
That’s it! With this simple solution, you can track the real referral on Google Analytics when PayPal is one of your payment processors.
PS. You can apply the same strategy to Facebook Analytics as well. You just need to enable and configure the same event for Facebook too.
2 Responses
What if both PayPal and Stripe are enabled?
The Id remains the same while selecting the CSS
Just the text in data-value Changes.
Any solution to this?
I set it up the way you explain here, but in analytics if I click the ecommerce tab, it won’t show the value of the transaction. What should I put in the “value” of Pixelyoursite settings?