One of the main reasons people chose to install PixelYourSite plugin is to correctly track their Facebook ads performance. And one of the most common questions I am being asked by our users is “Why my reports look wrong?”. Usually, There is not a single answer to this question, and that’s because there are more than one situations when things look or indeed they are not right. Sometimes the reports are right, but you got confused, sometimes the reports are slightly wrong, but there is not much that you can do about it, and sometimes the reports are totally off. The first thing you can do to fix it is to understand where the problem might be.
I am seeing a huge number of conversions in my reports
That was a common question from our early users. They were making an honest confusion, caused by the way the default FB reports count conversions. Actually, in these default reports, each event triggered on your site is counted as a conversion.
Solution: Create custom reports and track each individual event (or the one you are interested in). We have a comprehensive article on how to do it: click here for the custom reports article
I am seeing a bigger number of Purchase events (or any other event) than I should
Sometimes the reports will show a bigger number of purchases than you actually had on your website (or other conversions, like Lead, or CompleteRegistration). In this case, you are using custom reports, but the numbers don’t look right. Usually, this happens because the final page (thank you page, seen after the transaction is completed) is visited multiple times by the same user. The most common scenario, someone buys from your site, comes back on the thank you page a few times more (by mistake because the page was left open in the browser, or on purpose, to look for some information).
This is sometimes the case I am seeing on PixelYourSite.com, because on the final page of the transaction you also have the links to the files and the invoice, together with the license number. Some clients simply decide to save the page and re-visit it, instead of just to open the confirmation email, or enter their account.
Solution: PixelYourSite Pro has the option to fire the Purchase event on transaction only. You can find it under PixelYourSite > Facebook Pixel > WooCommerce tab. Open the Purchase event and you will see it there. Is turned ON by default. Turn it OFF if you need to test the event by refreshing the “Thank You” page.
I am seeing fewer Purchase events reported than the sales I have on my site
That’s the total opposite of the previous problem, and it sounds somehow better. More sales is not such a bad thing, right? But you do want your reports to be as correct as possible, so what’s the issue here? Well, there are a few possible reasons for such discrepancies.
Some sales are not Facebook ads generated
Not all your sales are coming from the ads and the reports will only show conversions generated by the ads.
It can also be a question of attribution window. You can play with the attribution window when creating custom reports.
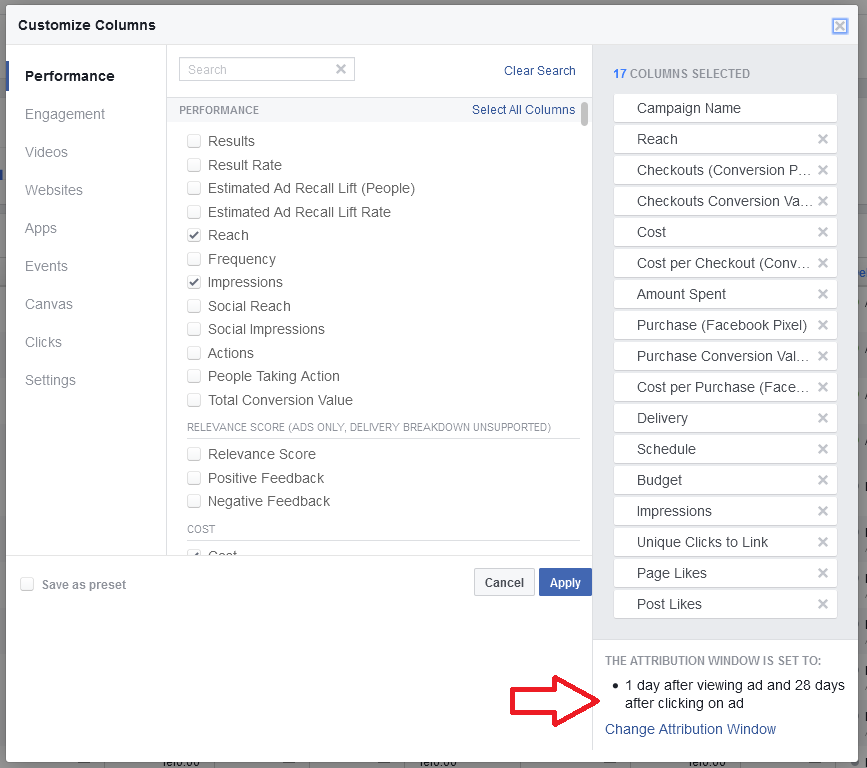
Important: the default attribution window for the ads is set to 1 day after viewing the ad and 28 days after clicking the ad.
As I mentioned earlier, the Ads Reports will only show the events generated by the ads, but you can see all your events on the Pixels Page: Here’s an article on how to use it
Not all your buyers land on the Thank You page
Another possible reason for seeing a lower number of reported Purchase events can be that the user doesn’t come back on the Thank You Page after the payment is processed. This has to do with the way your payment processor handles things. PayPal Standard, for example, gives you the auto-return option. Once the transaction is completed on PayPal, the user will be redirected back to your site, right on the thank you page (where the Purchase event will be the trigger).
Important: If the payment is made by card and not using a PayPal account, PayPal standard will not automatically redirect the users to your site, instead it will just show them a link to your page. If the user doesn’t come back, the Purchase event won’t be triggered, and will be completely missed by your reports.
Solution: make sure that the users always land on the final Thank You page after the transaction is completed. Set up PayPal auto-return
You’re using a “Custom Thank You Page” (CTP)
In order for PixelYourSite to track your sales (the Purchase event), your WooCommerce store must use the default WooCommerce default Thank You page (order-received).
If you want to use CTPs, you will need our special add-on, part of the Super-Pack.
This add-on will let you set up a redirect to a general CTP or individual CTPs for each product. The Purchase event will work in this scenario.
Incorrect WooCommerce settings
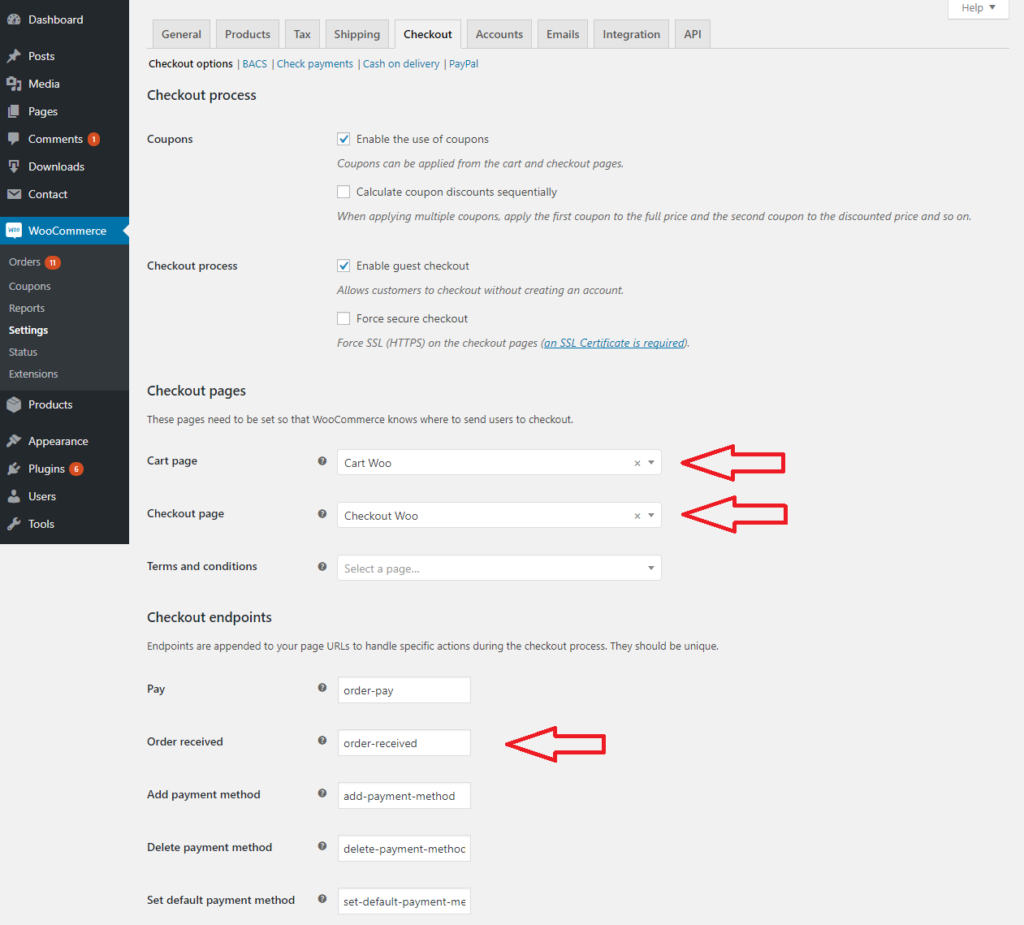
The plugin follows WooCommerce’s settings in order to fire each specific event. Because of this, you must keep the original Checkout settings under WooCommerce > Settings > Checkout > Checkout Options.
The Cart Page must be configured to your actual Cart Page (and not to the Checkout Page) and the Checkout Page must be configured to the actual Checkout Page. You might have different names for your pages.
If you want to redirect the cart page to the checkout page, you can do it by adding a 301 redirect on the cart page. A dedicated redirect plugin can help – there are a few free ones in the WordPress repository.
The ads are not tracked by your pixel (or by the correct pixel)
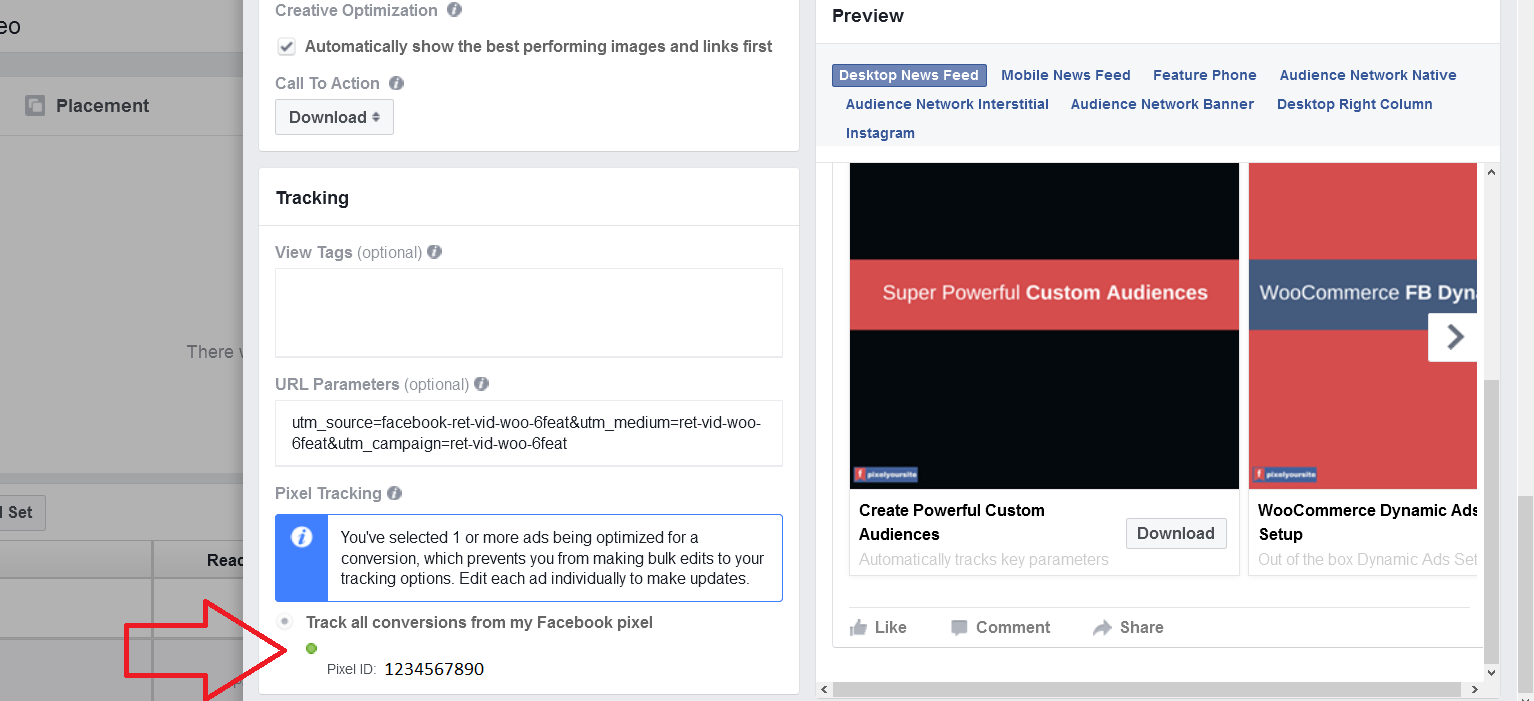
You can decide if and an ad is tracked by the pixel when you create it and you can also edit this part if you need to.
Attention, not all ads are tracked by default. While ads in campaigns optimized for conversion will be tracked, ads promoting posts will be unconnected to any pixel by default, for example. Make sure you change that, when necessary. It is also possible that you have more than one pixels associated with your account, so keep an eye on this check the pixel ID. It has to be the same one you are using on the site.
How to make sure that your reports are correct and you track all your events
Check your pixel
Test and see if the pixel is working on your website and if all the events are triggered where and when you need them. Use Pixel Helper Chrome Extension, but be prepared to see some false errors reported as well. While Pixel Helper is a fantastic tool, it does tend to be confusing sometimes, giving false warnings for normal situations.
We have a special article about Pixel Helper and how to read its reports.
Additional things you can do (or should do)
Use Google Analytics with E-commerce enabled and URL tags on your ads
This strategy will let you double check the performance with your ads. By adding URL tags to your ads you will let Google Analytics to track the e-commerce results and correctly attribute them to your Facebook Ads. You can implement Google Analytics with Enhanced Ecommerce using PixelYourSite. See docs here
Check (and play with) the attribution window for your ads
You can change the attribution window for each custom report you create. By default is set to 1 day after viewing the ad and 28 days after clicking on the ad.
Conversion Window
To make things more fun, complex and confusing, Facebook also has a metric called conversion window. It is an option you have for ads optimized for conversion, letting you decide between 1 or 7 days long.
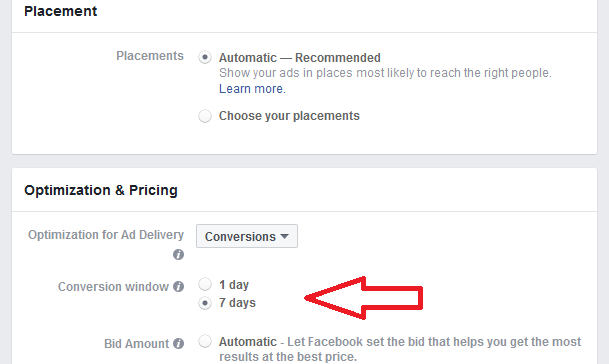
That’s the time between clicking or viewing the ad and completing the action you are optimizing for (triggering the selected event). It tells Facebook whether to focus on 1 day or 7 days worth of conversion data when determining who should see your ad.
As you can see, you can have a conversion window of one day and different attribution window for your ads reports.
5 Responses
Thanks a lot for sharing these details.
it’s all too hard!! I have no time for this, I set my pixel up about a year ago and only today figured out that there was this report full of useless incorrect information that I am not going to bother to fix because all this effort still does nothing to help my business and facebook is a complete time waster that almost sent me out of business until I stopped worrying about all this crap and got back to work. Bye
Maybe you should hire somebody for social media marketing instead.
hi, i really need your help, i installed pixelmysite and i’m getting more purchases in my analytics, i know the exact amount of purchases and it’s not correct. can you help me solve this? i don’t have a pro version, in another site i have it works fine (also no pro version).
Seeing extra purchases that did not happen on the actual store cant be the thank you page in my opinion. Those extra purchases can end up on adsets that did not have any purchases whatsoever. In addition to the lack of actual purchases on those adsets, the dollar amount of the purchases are different from any set of invoices set out to customers. The most common one is the $99 purchases that could happen on a few adsets during a 2 or 3 day test campaign and harm the testing phase of product advertising. It would be great if you could look into those issues, because Facebook does not have any support offered for such cases and there is no way for us to contact them. Anyways this was a cool article.